
Sri Lankan Thati paan (flat-bread) is a crusty bread variety that mainly uses to serve with curries for breakfast or dinner. It has the same height as usual bread loaves but much thinner and crusty all around. But not as thin as Sri Lankan roast pan which is another flatbread variety that is a smaller version of this Thati pan.
The Process Overview
This Sri Lankan Thati Paan (flat-bread) making process is very easy and very similar to the normal bread baking method. If you’re familiar with load bread or sandwich bread making this is a few additional steps away from that method. You can use this same dough and process to make 12 Sri Lankan Roast Paan too.
Here is a brief step-by-step guide for quick reference.
- First, you mix everything and knead the dough.
- Let the dough rise (about 1hr).
- Remove the gas and divide the dough and make dough balls.
- Let the dough balls rest (for about 15 mins)
- Shape each dough ball into rectangles and then roll it into a cylinder.
- Apply the oil-flour mixture between each dough and arrange them in a loaf pan.
- Let them rise again (for about 45mins)
- Spray the top of the dough with some water
- Bake until crusty and brown (for about 30 – 40 mins on preheated 400F/ 200 C)
- Separate each bread
- Apply butter on both sides and broil both sides for 1-2min each side until nice and golden
With the amount I’ve given here can make 6 Thati Paan (flat-bread). Which is similar to two loaves of bread/ sandwich bread in volume. Simply half the recipe if you want just 3 flatbread which is similar to one loaf of bread in volume.
Important Info
Make sure your yeast is working. What I use is rapid rise yeast/instant dry yeast. This variety doesn’t need to be activated. If you know the yeast is freshly bough and out of a new pack then you can mix everything directly together. But if you’re using active dry yeast or if you’re not sure how good/active your yeast is then make sure to add the yeast to the lukewarm water+milk mixture first and see if it starts to make foam immediately. For active dry yeast let the yeast mixture sit there on the counter for about 10mins to activate the yeast.
Knead the dough in the machine for 8-10 mins until it becomes very soft pliable yet non-sticky. It can be slightly tacky but once it rises it should be fine. If you knead by hand, check/activate yeast first in a bowl and then add sugar, butter, salt and mix with a fork/spoon. And then add flour a little by little and mix with a fork/spoon. Don’t add all the flour. Once it starts to make lumps, dump everything to a kneading bench/worktop and knead while adding flour a little by little as need to make a non-sticky dough. You may have to knead for about 15-20 mins to make it to a soft pliable, lump-free dough.
Always keep your dough covered with a plastic wrap to keep them from drying out and forming a skin on the top. Only take out the dough you’re working with and keep all the other dough balls/pieces covered.
The rising time depends on the temperature of your house and also how activate your yeast is. My advice is to focus on the volume of the dough rather than time. Take the time I’ve given you as a guideline. It might take more or less time for your dough to rise than it would take for mine.
If the dough shrinks when you flatten it out that means gluten in your dough hasn’t rested enough. Let the dough balls rest a little longer before you start to shape. Usually, 15-20 mins are enough.
Apply oil or butter to your bread pan to easily release the bread. When you place your shaped dough in the loaf pan, make sure you apply the oil-flour mixture generously on both sides of the dough as it prevents the doughs from sticking together. Press the cylinder a little bit before you place them so all three dough cylinders can fit well together.
Every oven is different and many aren’t calibrated properly. So your baking time may vary. When the bread is properly baked it’s brown on all sides and you can easily take out the bread from the pan. If you have an instant thermometer insert it into the bread and see if it reaches 200F to confirm. But don’t worry if you don’t have one. Usually, 30-40 mins are enough, and if it’s browning too quickly reduce the oven temp in a few degrees. and if it hasn’t browned yet after about 30 mins, leave it in the oven for a little longer and you may have to increase the oven temperature by a few degrees.
Some ovens don’t have a broiling option. If so turn on the top burner/coil only and broil each side of the bread until they become golden brown and crispy. The first batch usually takes longer to broil but after that, when the coil/burner is hot it doesn’t take that long to brown. So keep the oven door open slightly and keep your eyes on them they can go brown to burn pretty quickly.

How to serve Thati Paan
As I mentioned before, the traditional and most popular way to serve this flatbread is with curries and spicy sambol like Sri Lankan coconut sambol or Seeni Sambol (Caramelized spicy onion). The popular curries are red lentil curry, chicken curry, potato curry, black pork curry. And you usually cut the bread into slices before you serve.
You can also use this bread to make sandwiches too. Simply cut the bread in half or into quarters and carefully split the piece of bread into two equal sides. And then fill them with any of your favorite fillings. Since these Sri Lankan Thati Paan (flat-bread) are very crusty they go well with soup and stews too.
If you tried this recipe and you like it please do me a favor and rate the recipe below. It helps me to grow and reach more people. If you have any questions or suggestions leave in the comment section below as well. I’m happy to hear from you.


Sri Lankan Thati Paan (flat-bread)
Description
Sri Lankan Thati paan (flat-bread) is a crusty bread variety that mainly uses to serve with curries for dinner or breakfast. Golden and crusty on the outside yet fluffy and soft on the inside. Very comforting and super delicious.
Ingredients
For the oil-flour mixture
Other
Instructions
Make the dough
-
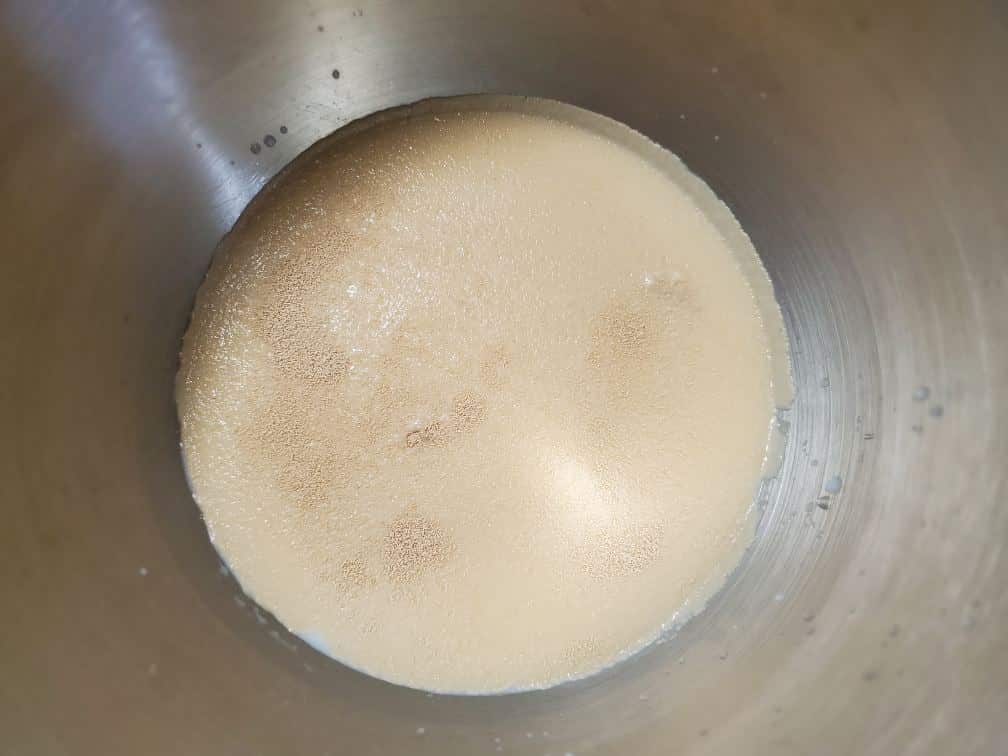
Mix water and milk together. Make sure they both are in lukewarm temp. Dump the sugar. Do not mix. Sprinkle the yeast over the surface. It should start to foam up immediately on the edges.
(If not your yeast is not good and might have expired. Throw away and start fresh with new yeast.)
-
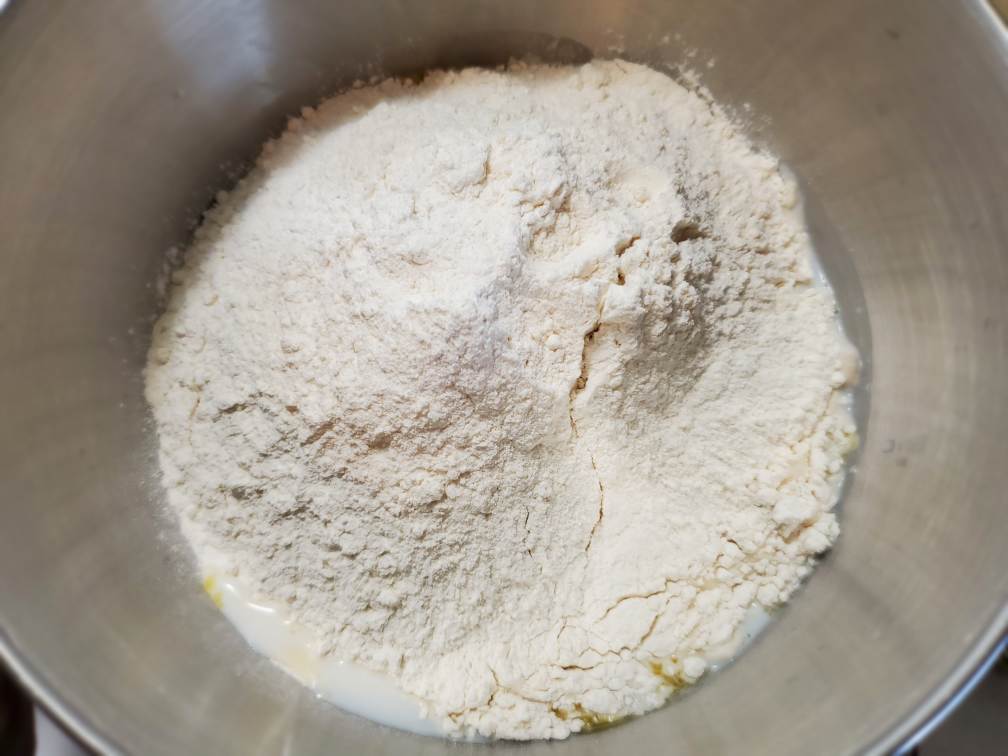
Add softened butter and salt. give a quick mix. And then add flour.
-
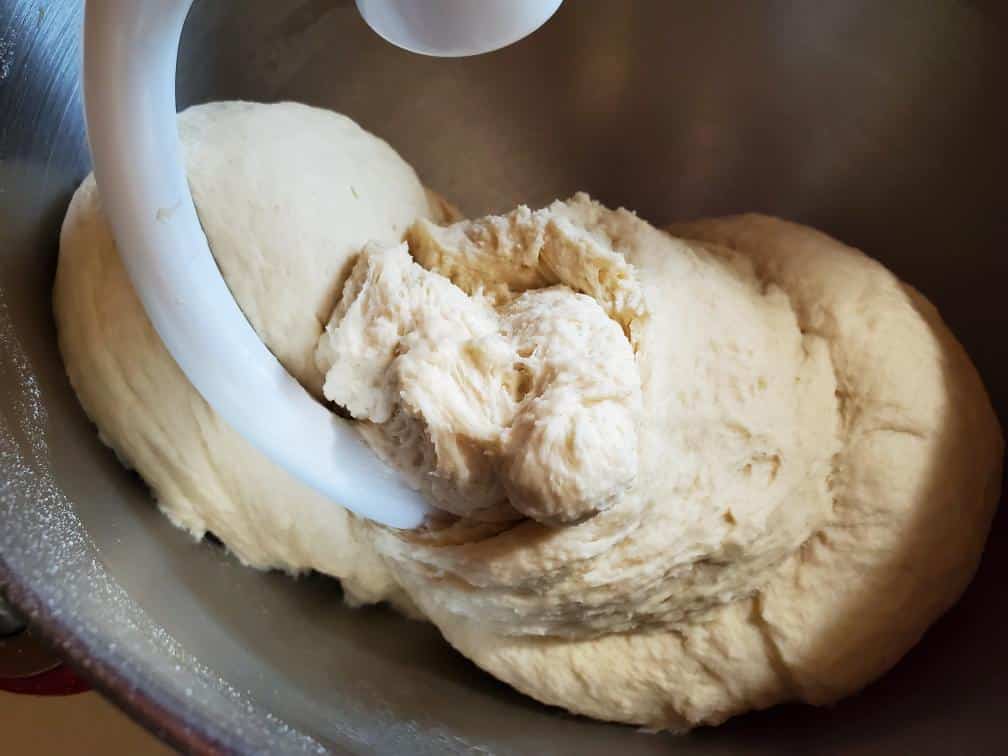
Knead the dough (about 8 - 10mins in the machine or 15-20 mins with hands) until it becomes soft, pliable, and lump-free. Read the recipe description for hand kneading instructions.


First Rise
-
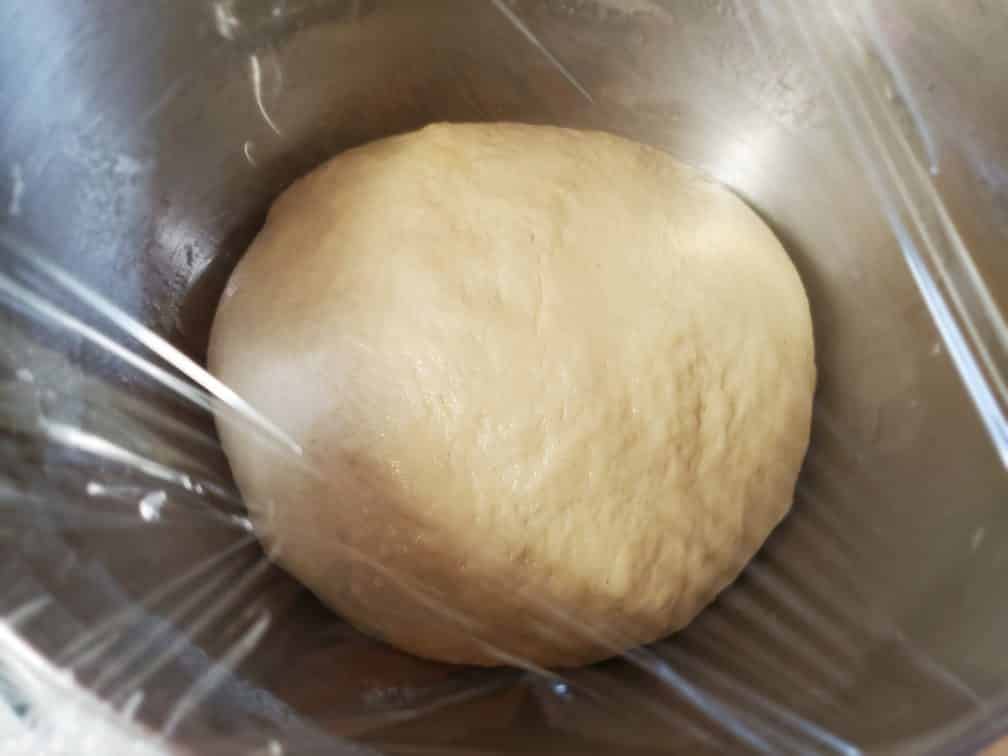
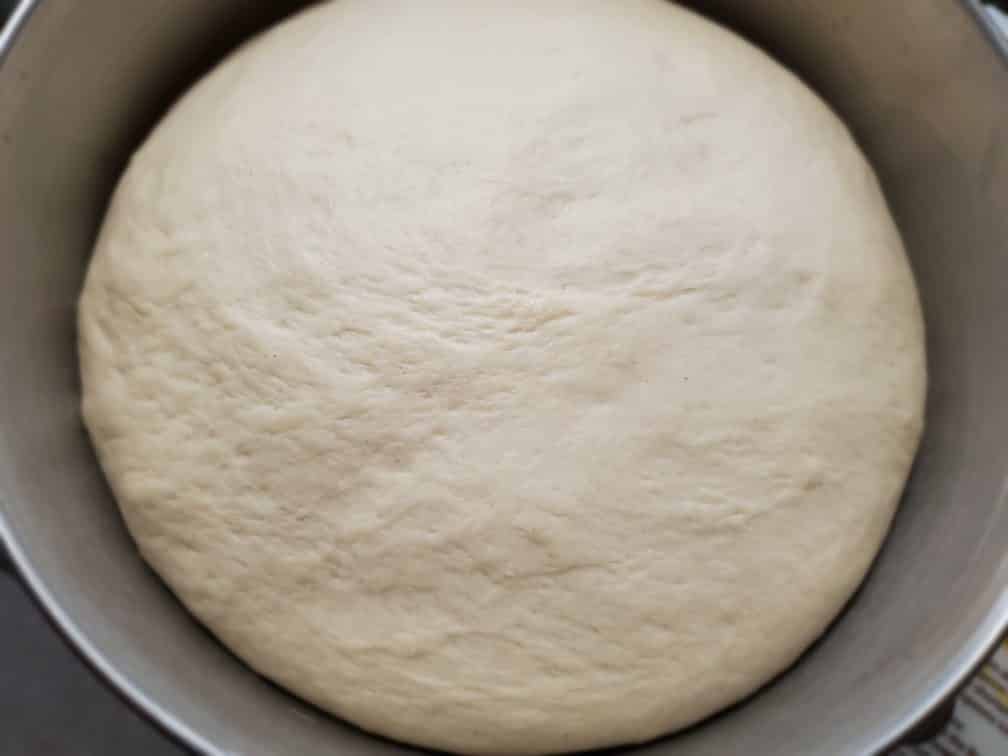
Make the dough into a rough ball with your hands. Apply some oil to the bowl. Put the dough in, seam side down. And apply a few drops of oil on top of the dough as well. Cover with plastic wrap.
-
Let the dough rise until it's doubled in size. This would take roughly about 1 hr depending on the room temperature. Focus on the volume rather than time.


Dividing Resting and Shaping
-
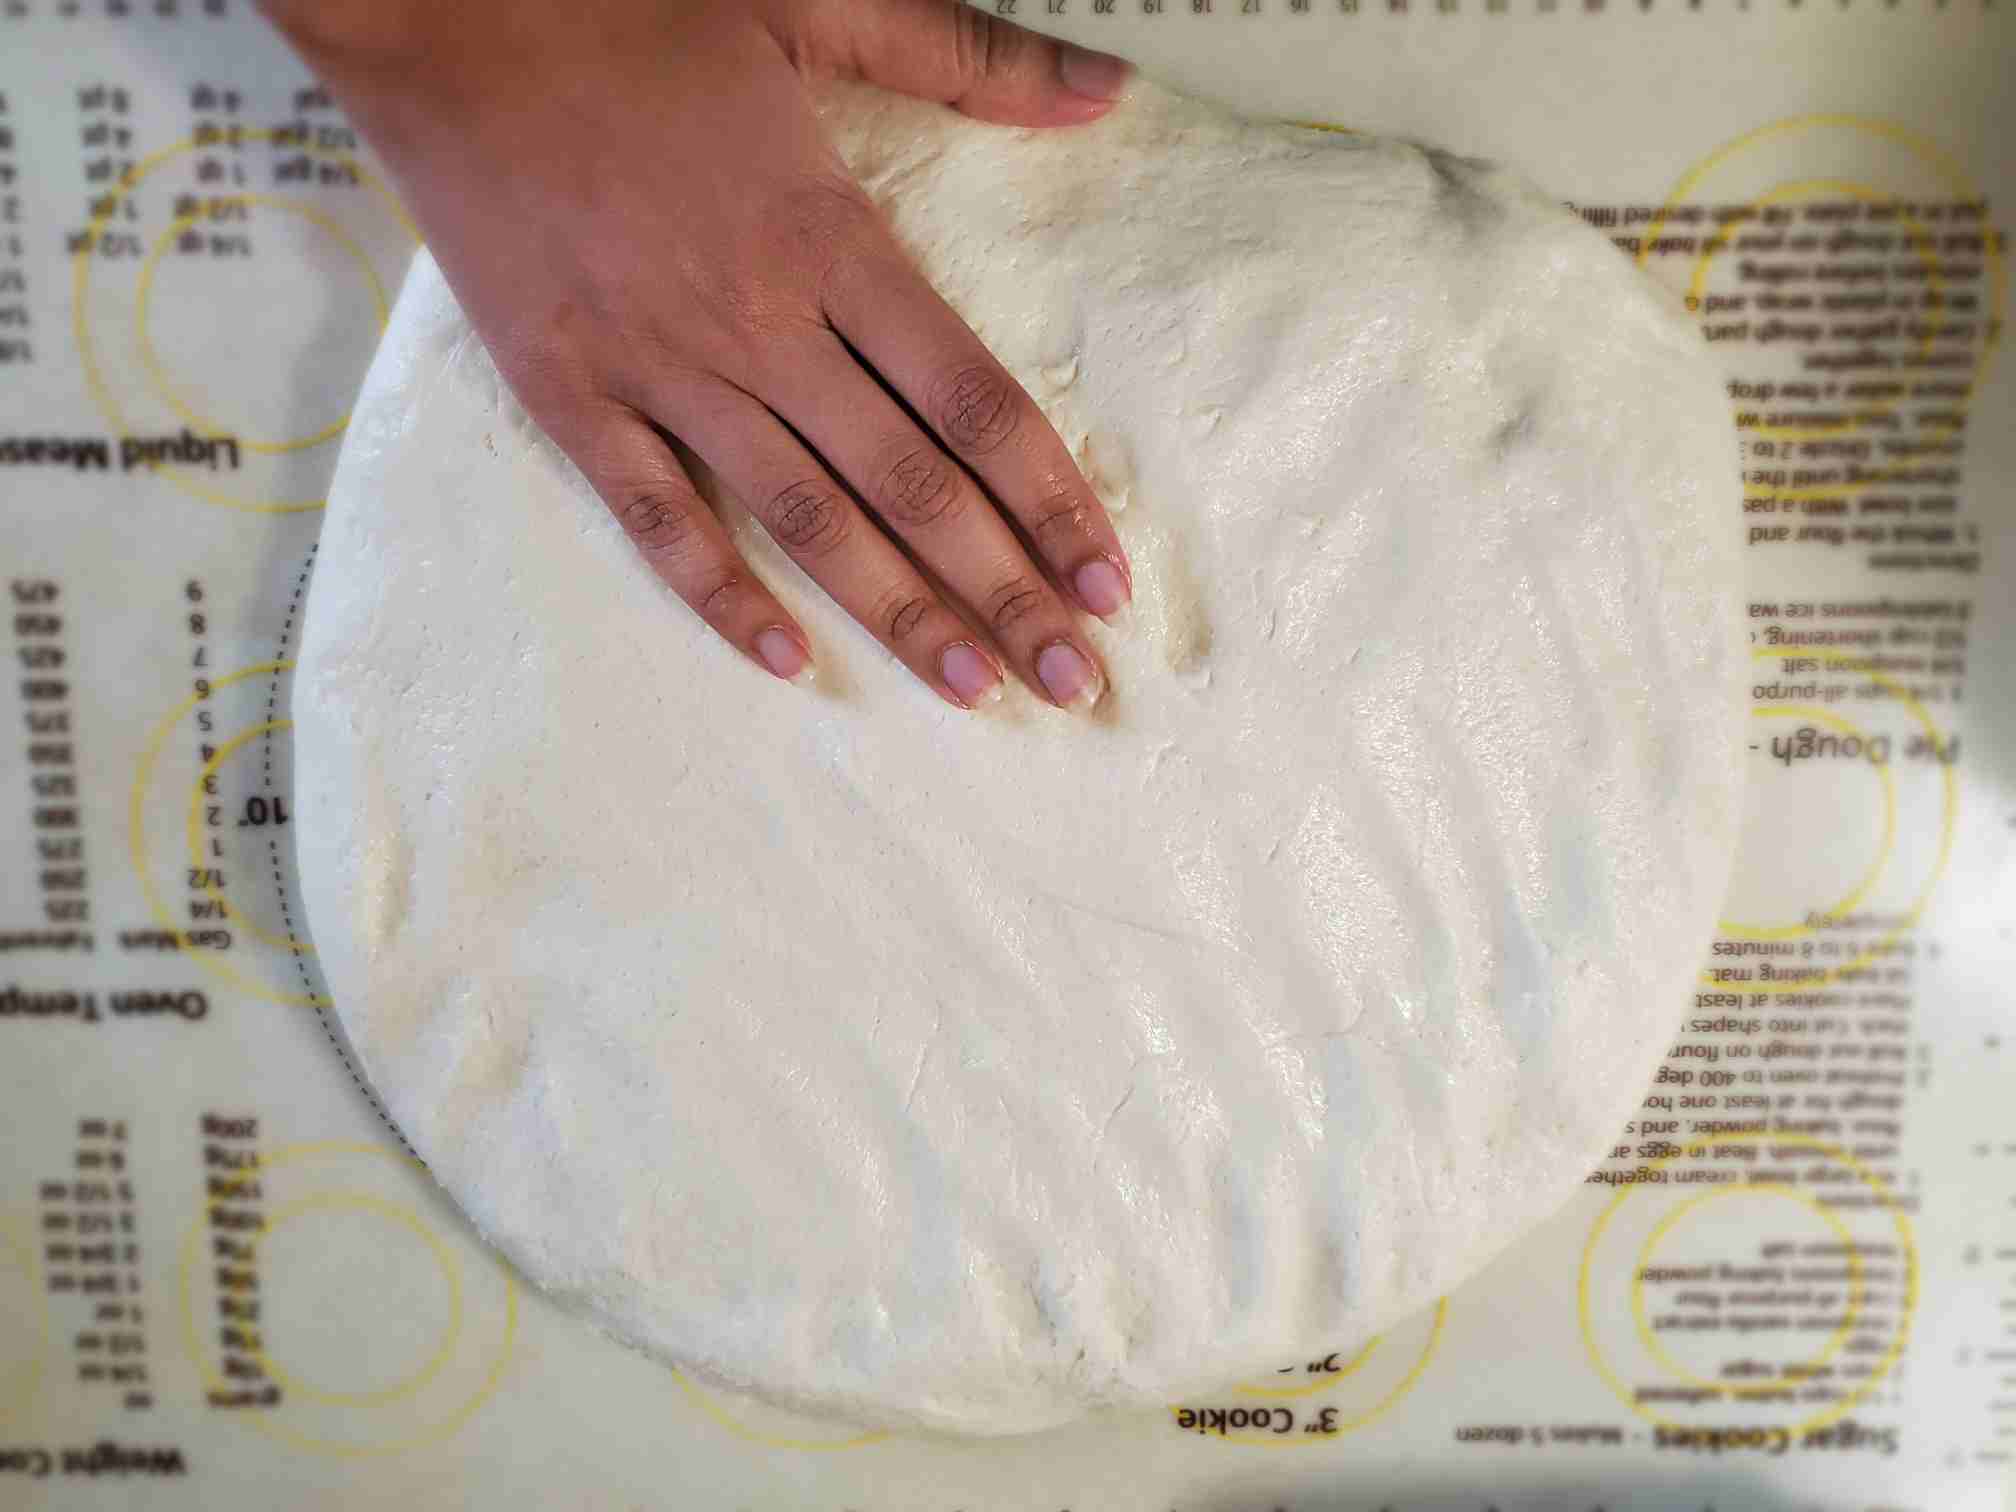
Transfer the dough to your worktop and remove gas by pressing the dough down.
-
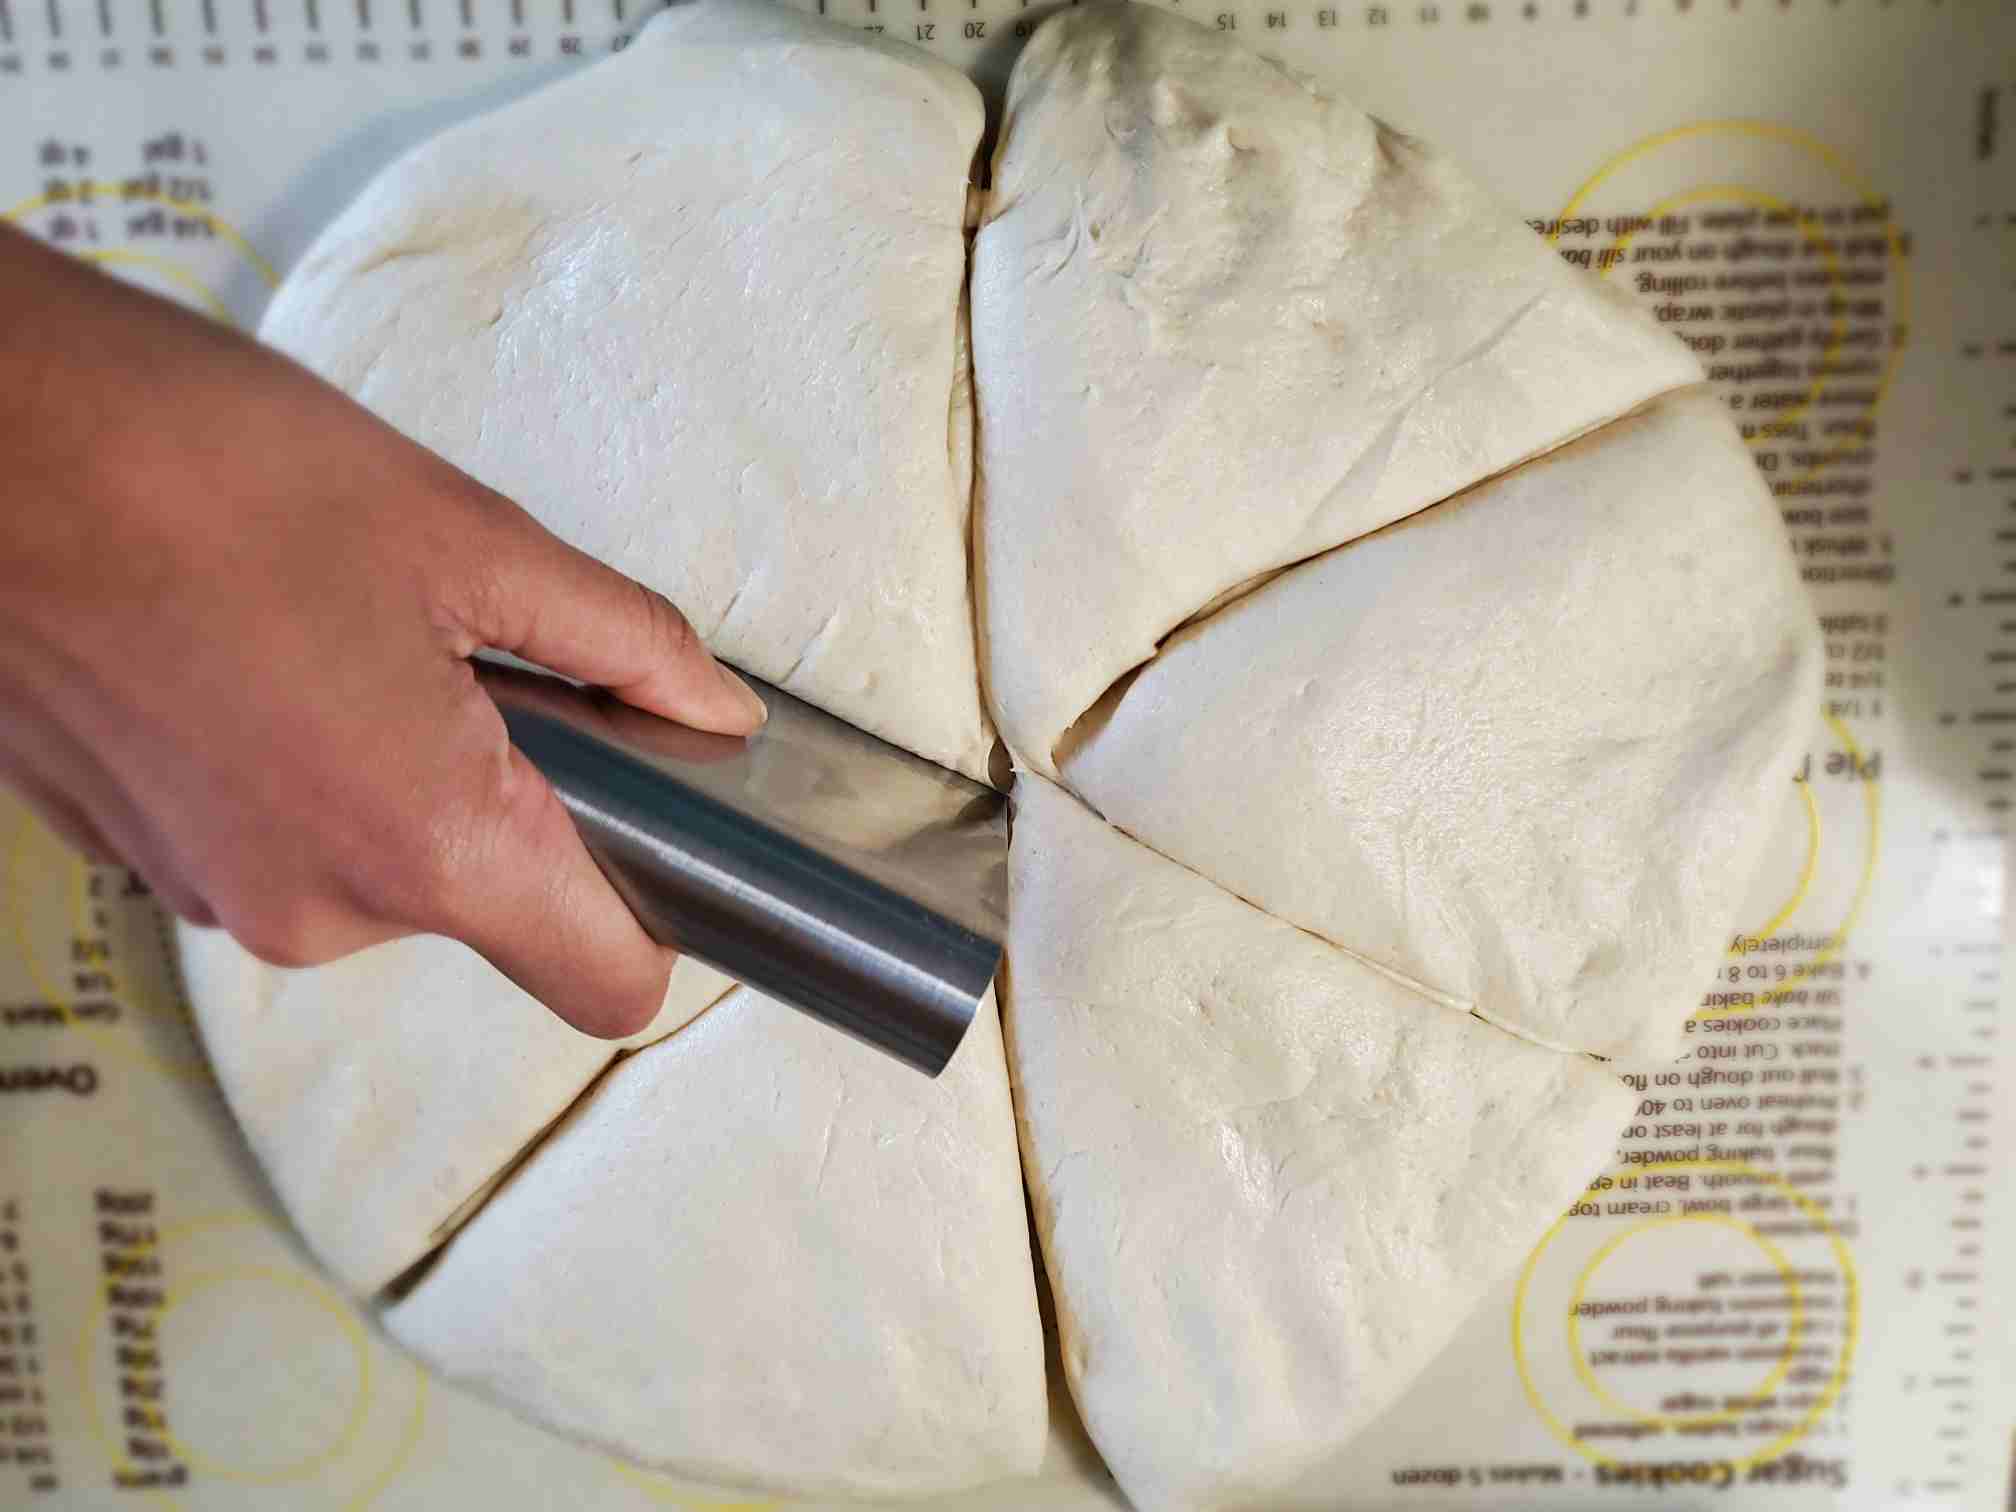
Divide the dough into 6 equal pieces. Roughly about 265g each.
-
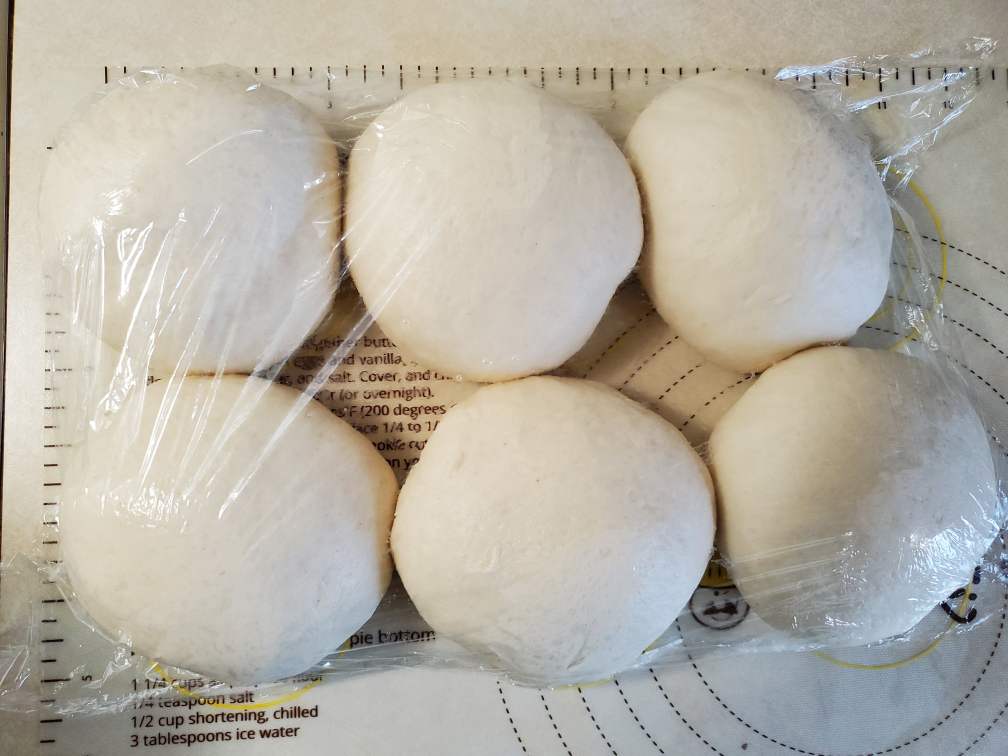
Make each dough piece into rough balls with your hands. Arrange them on aside of your worktop. Cover with a piece of plastic wrap again and let them rest for about 15 mins. So the gluten would have some time to relax and it would be easier to flatten them out in the next step
-
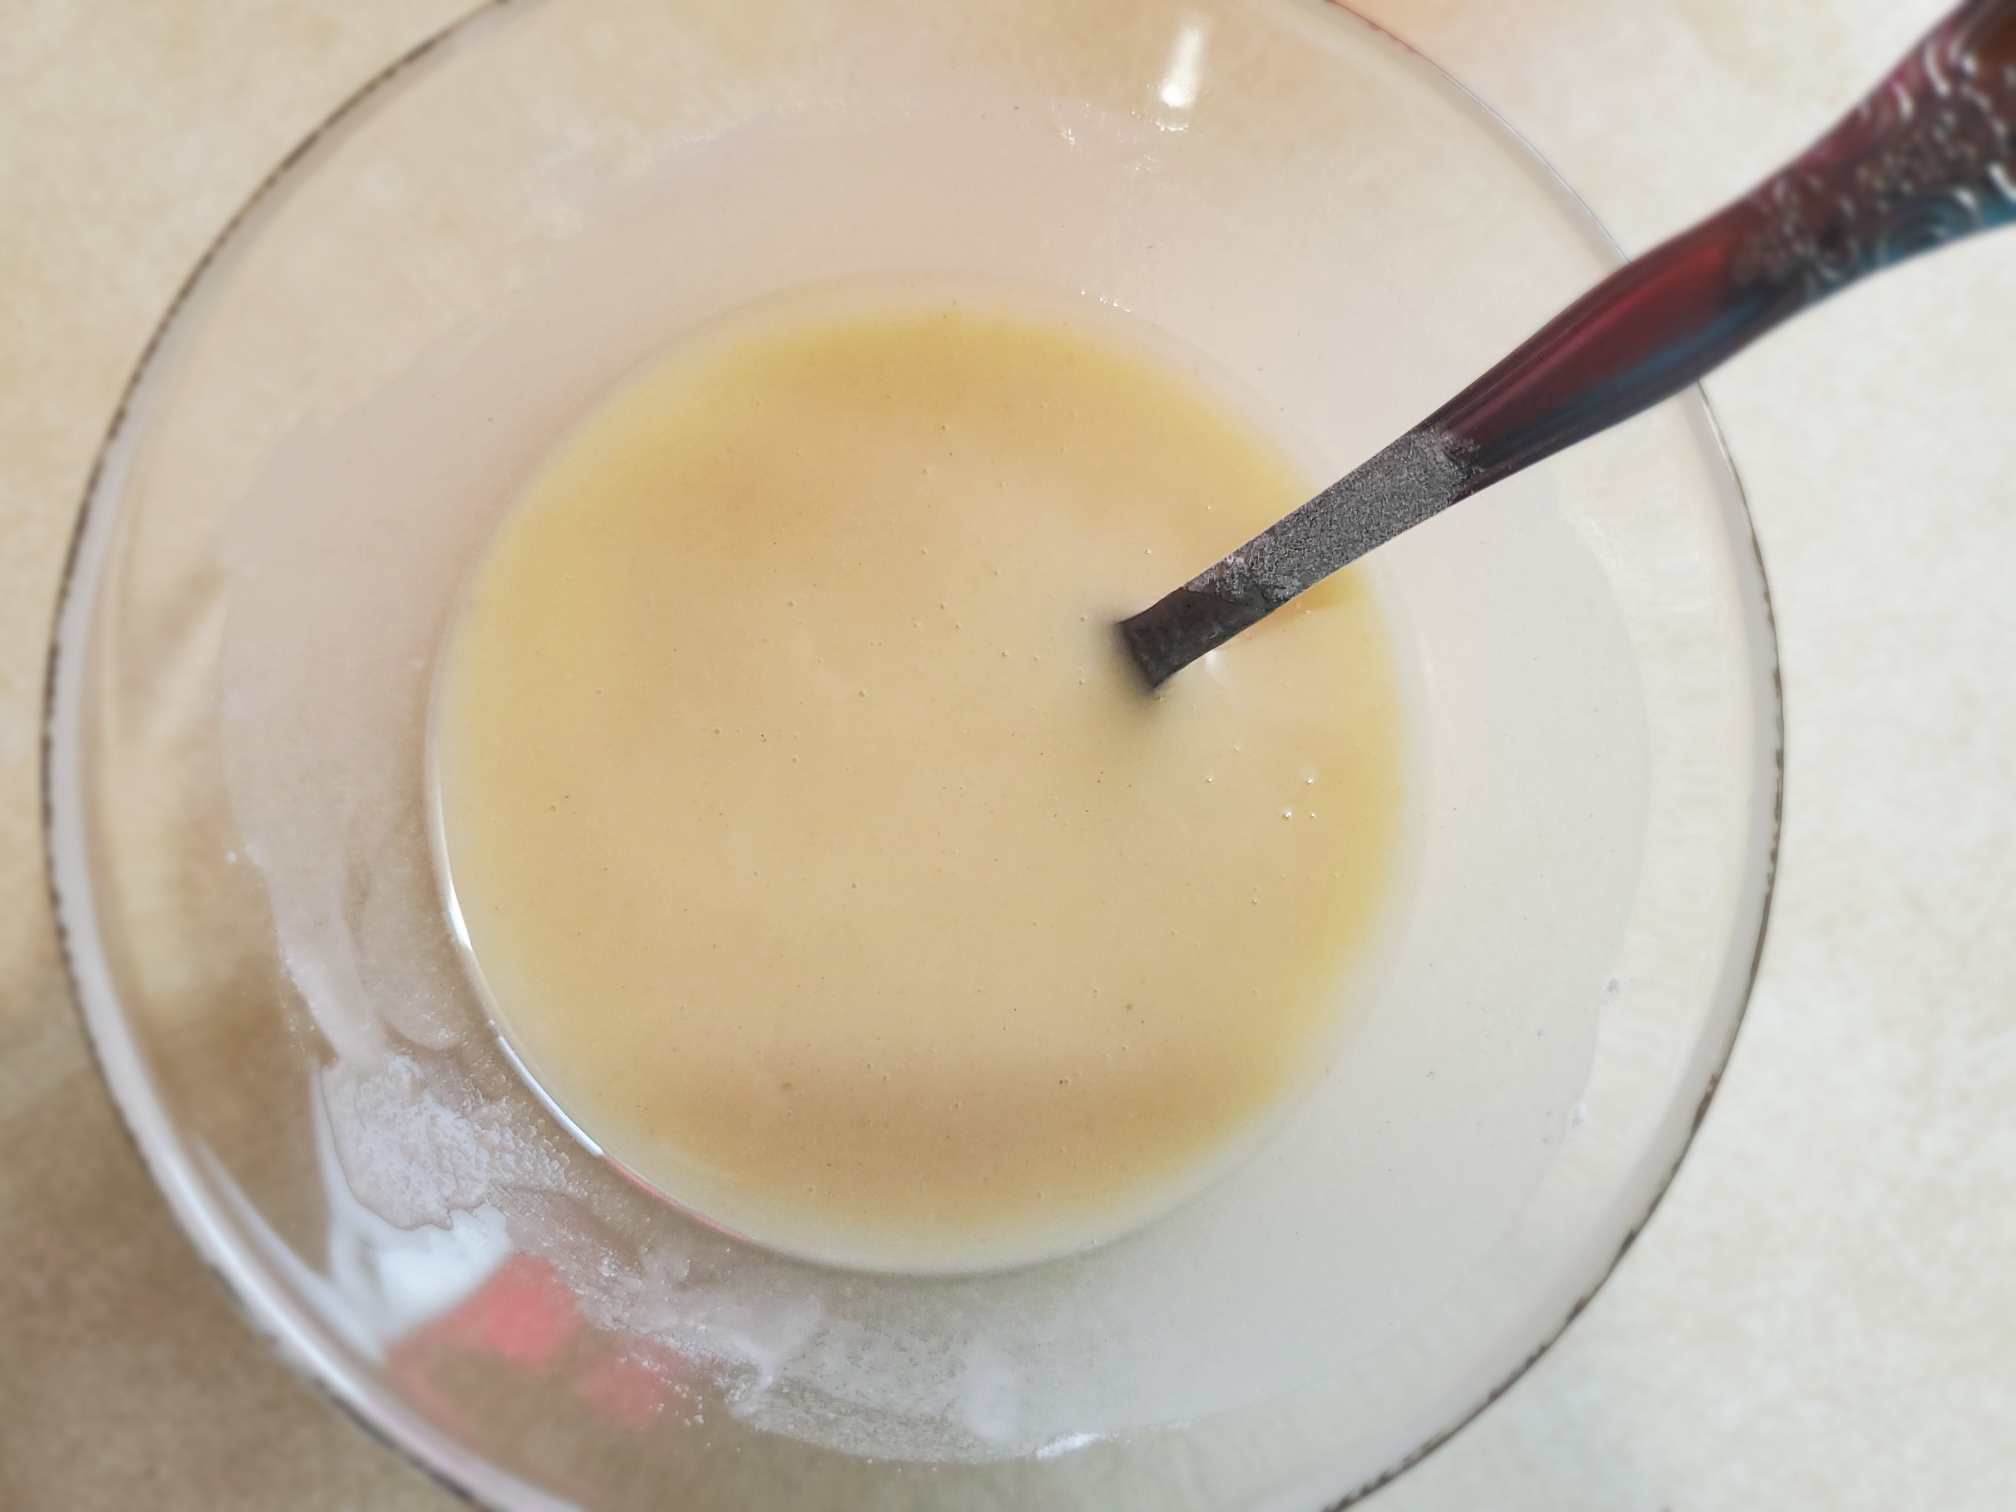
Meanwhile, make the oil-flour mixture in a small bowl.
-
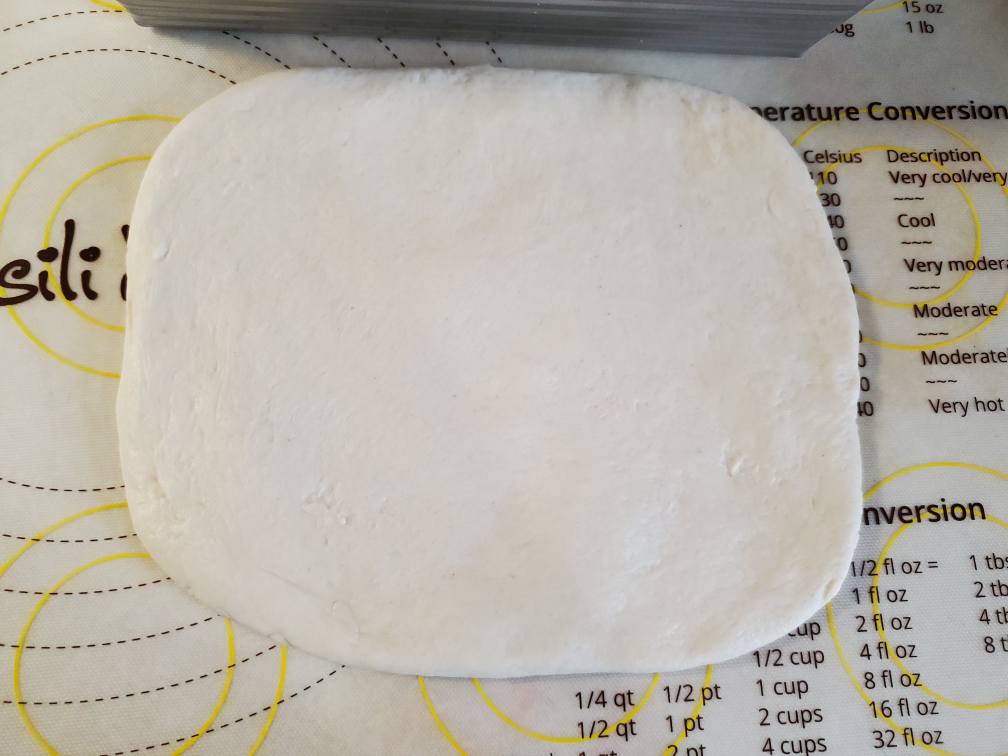
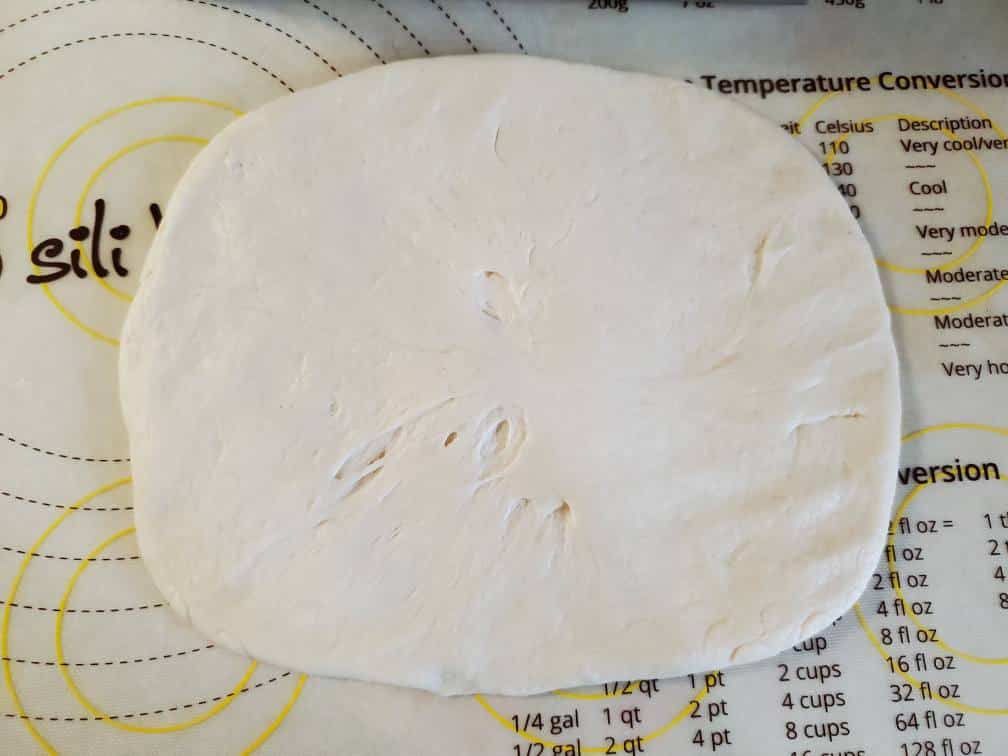
Take one ball out and flatten it out to a rectangular shape. The width should be similar to the width of the bread pan you’re using. Use your bread pan as a guideline.
-
Turn it upside down. So when you roll the dough the smoother surface goes to the outer visible side.
-
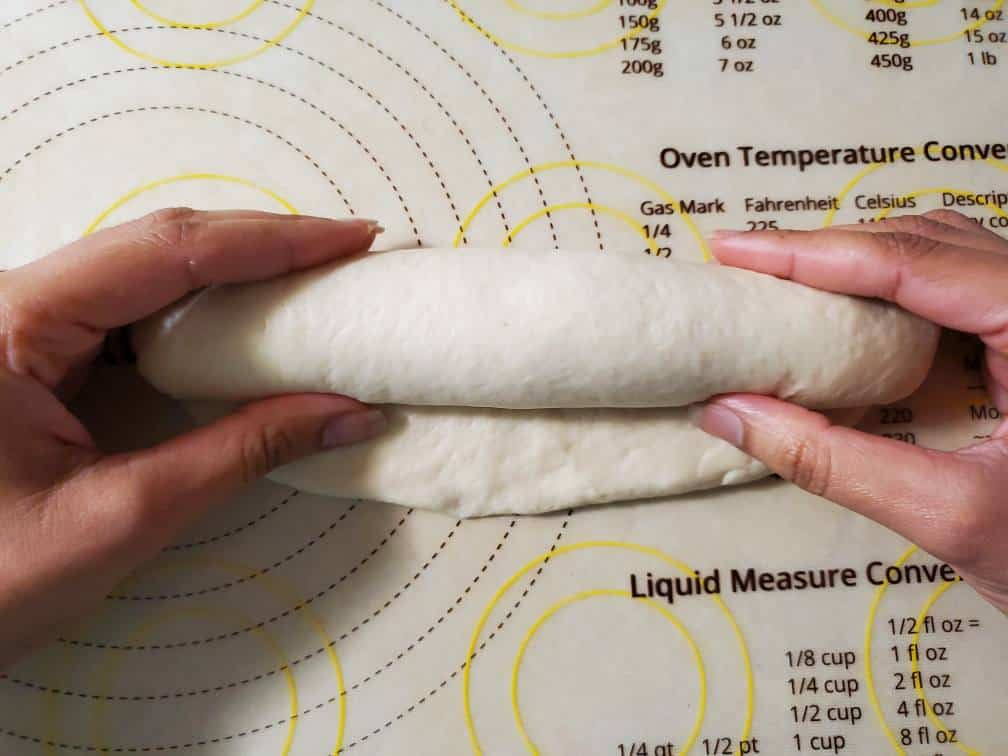
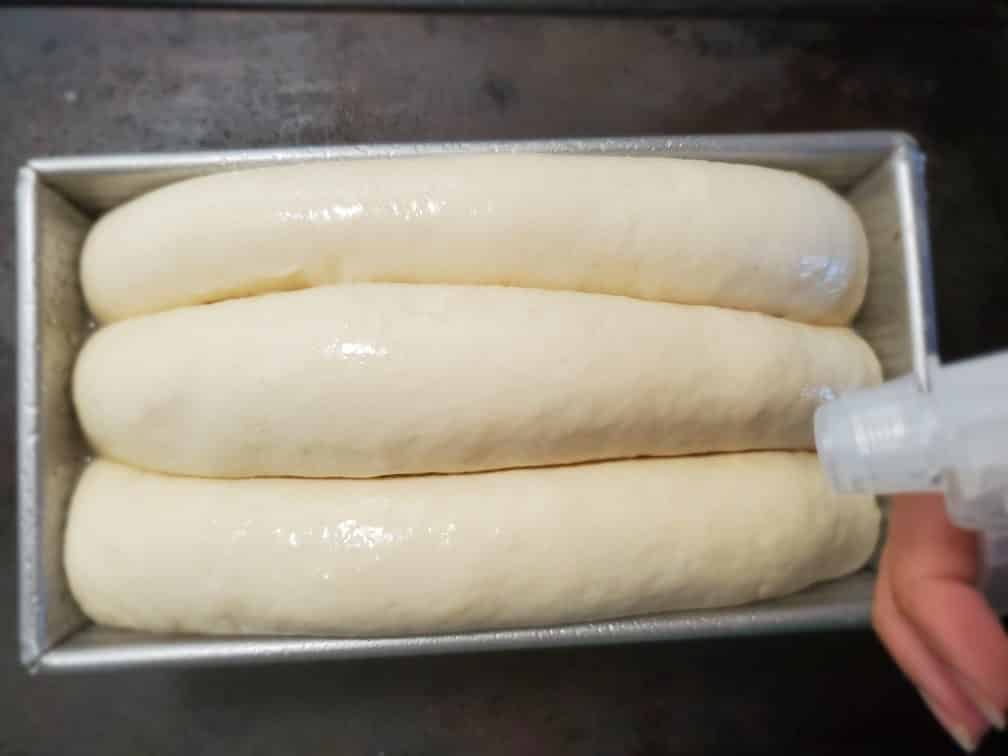
Roll the dough from top to bottom. Seal the edges with your fingers by pressing the edge with the dough or turn the seam side down to face the worktop and press the dough gently with your hands so the edges stick to the dough. Seal left and right sides too. It should look like a cylinder now. (Three of these cylindrical-shaped doughs go into one loaf pan). Also, cover the inside of the loaf pans with butter or oil.
-
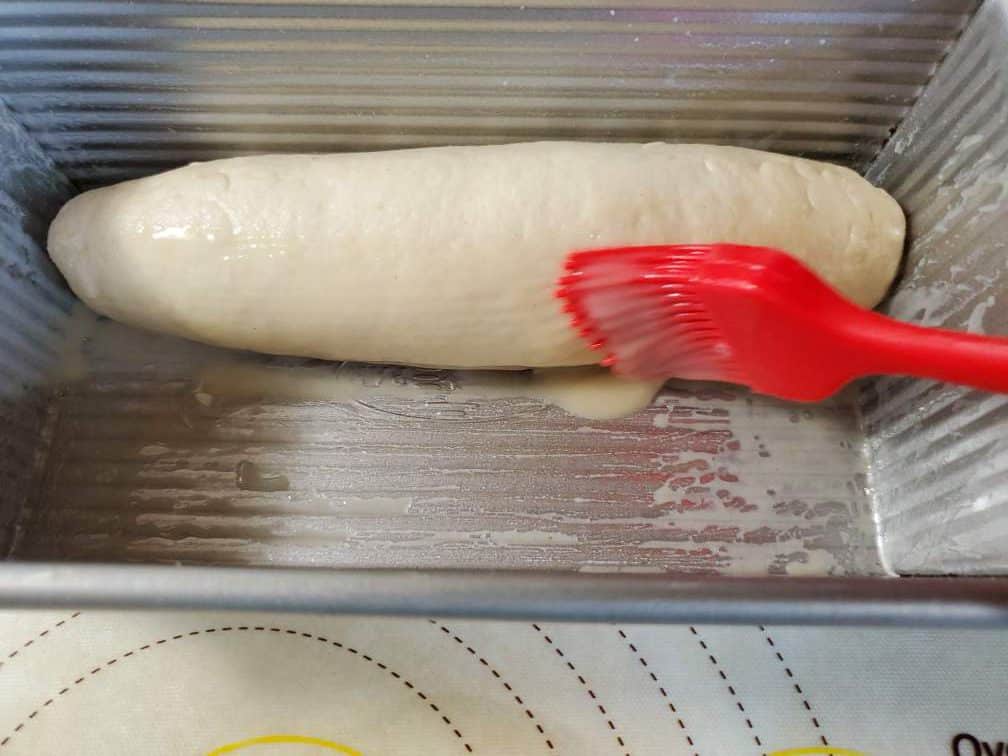
Transfer the dough into the loaf pan, seam side down, and push it to one side. Apply the oil-flour mixture on the visible side so it's easier to separate bread.
-
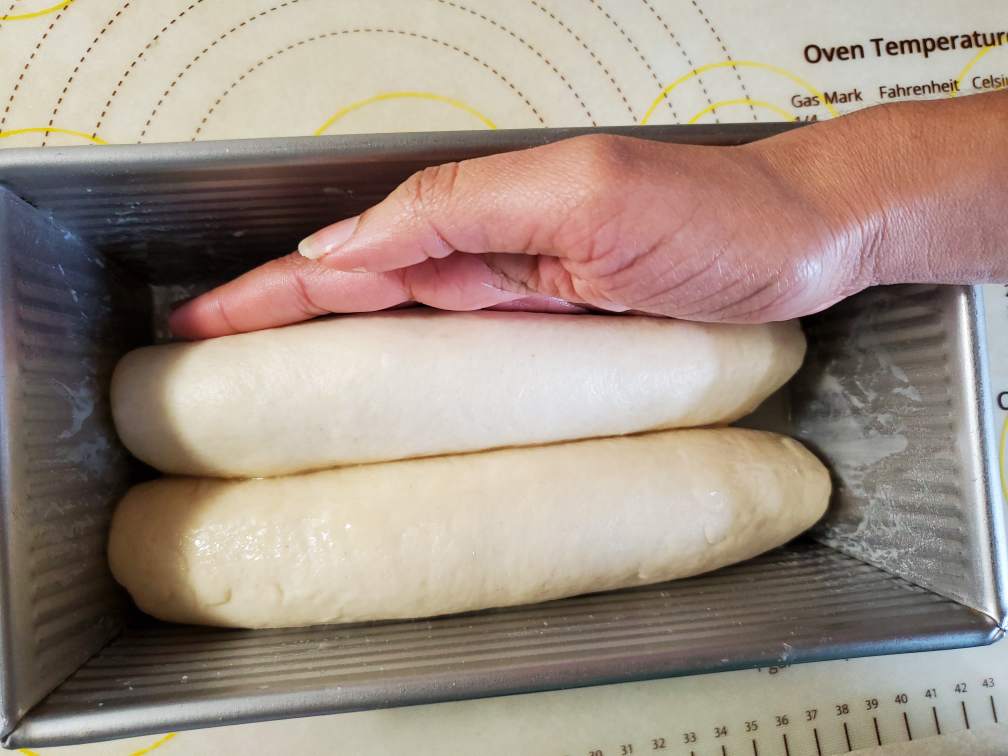
Make two more cylindrical-shaped doughs for one loaf pan. Put the second dough in. You may see that there isn’t enough space for the third one. Now press the two doughs together to get enough space for the third one as shown in the photo. So they become slightly flat. Apply the flour-oil mixture on the side.
-
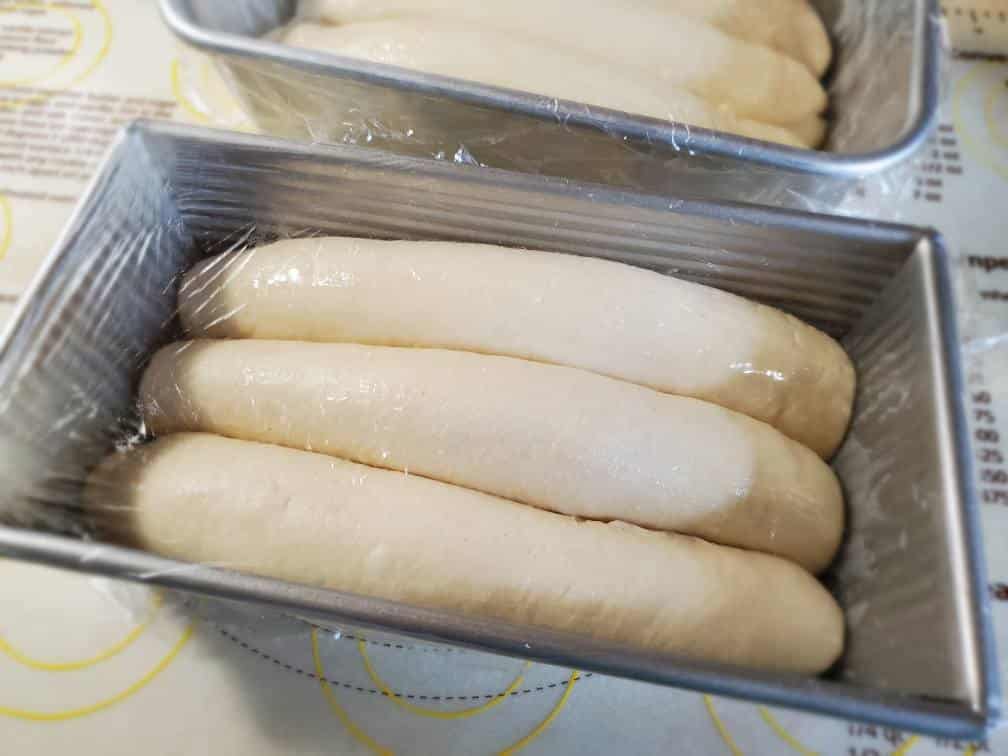
Press the third one on the worktop to flatten it out a little bit so it's easier to fit in the loaf pan. Put the dough in. Only three doughs go into one pan. Fill another loaf pan with the other three dough balls the same way we did earlier. Cover them with plastic wrap.


Second Rise
-
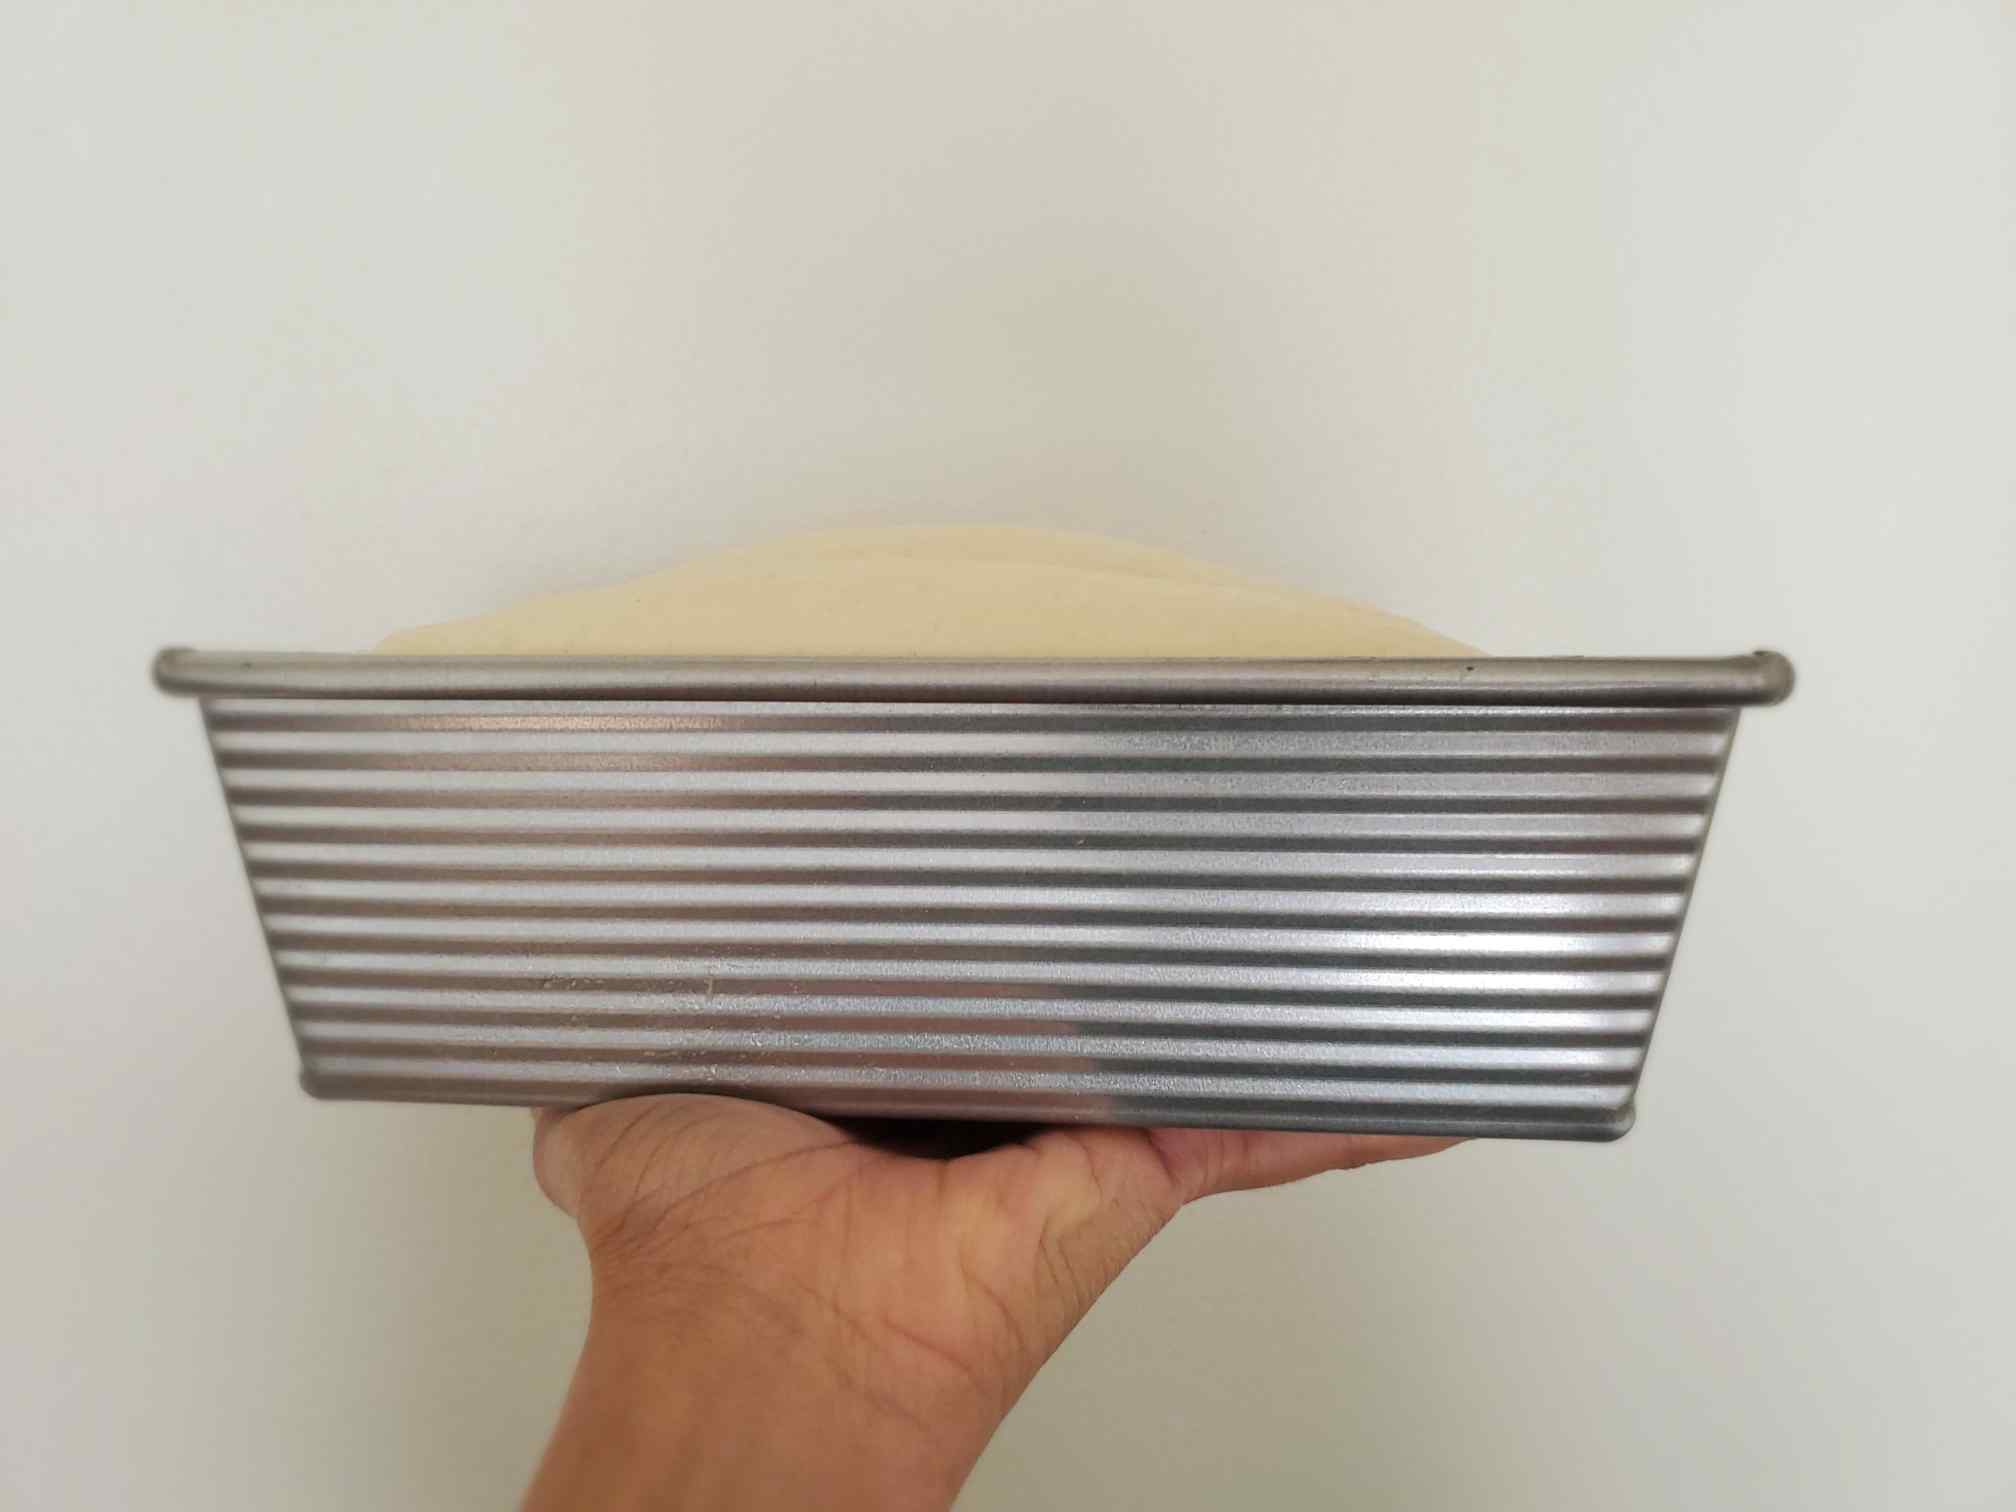
Let them rise until the middle of the dough reaches about an inch above the rim of the pan. Or they’ve doubled in size again. This would take roughly about 45 mins. Also, don't forget to preheat your oven to 400F/ 200C for about 20 mins.

Baking and Broiling
-
When they’re are properly risen, spray (or brush if you don’t have a spray) some water on the top of the bread. This will help the bread to rise better in the oven and make the top crusty.
-
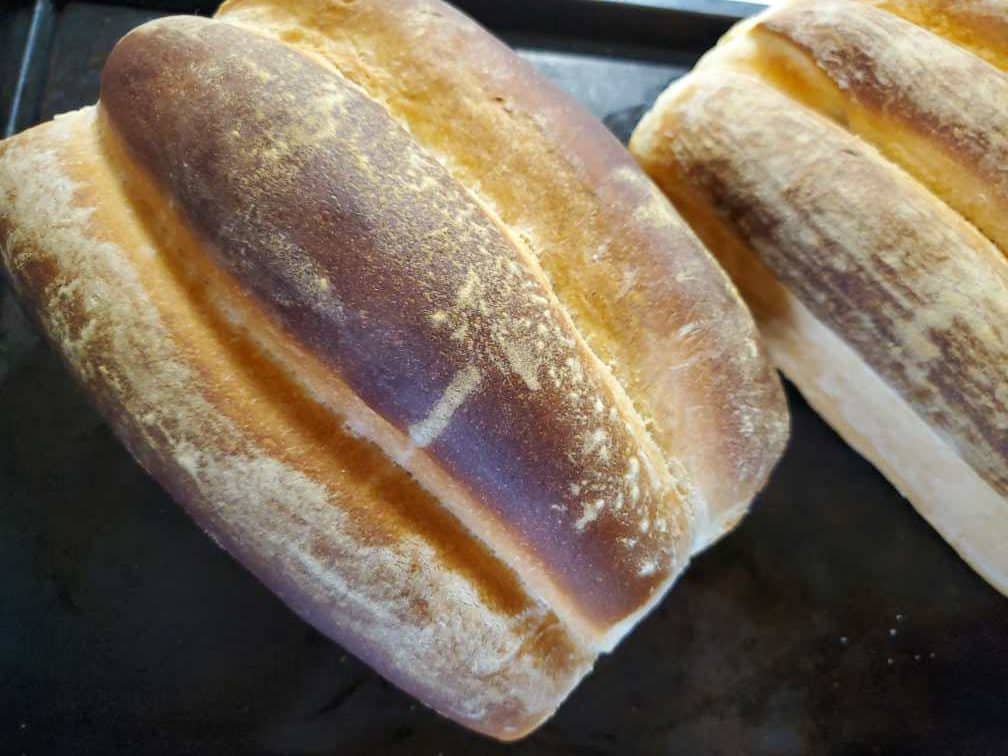
Bake them in the oven for about 30 - 40 mins. This time varies from oven to oven. If you’re using a smaller convectional oven there is a chance that your bread browns quicker. Check on your bread after about 20 mins. If they seem to brown too quickly, transfer them to a lower rack and reduce the temperature a little bit. (Read important info on recipe description)
-
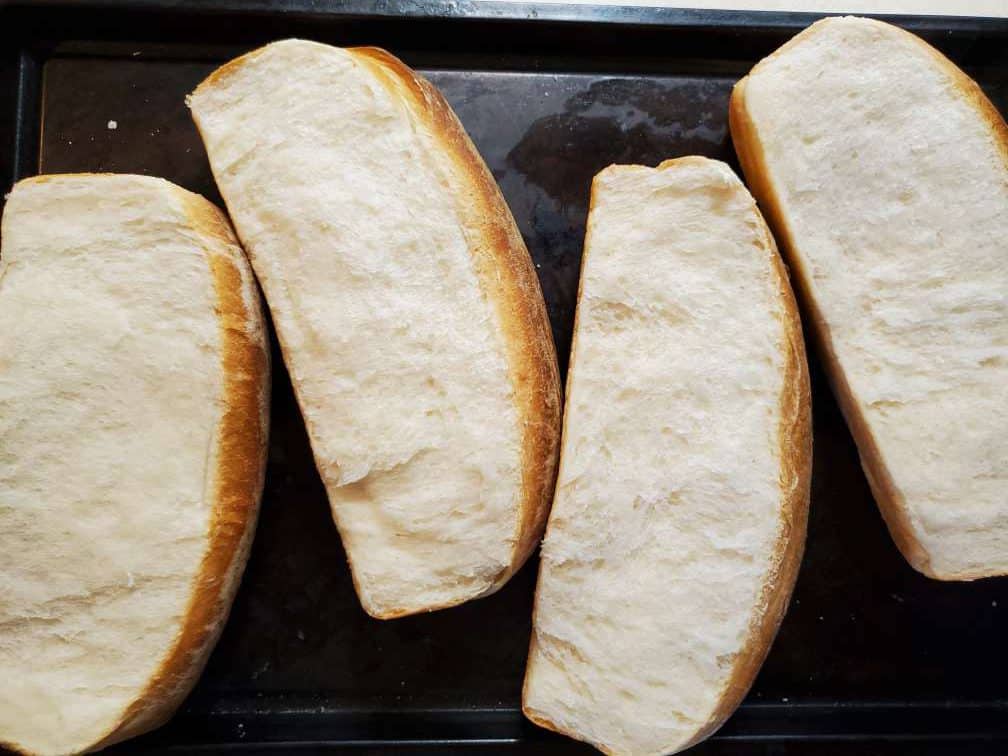
Separate each Thati paan carefully and lay them on a baking sheet.
-
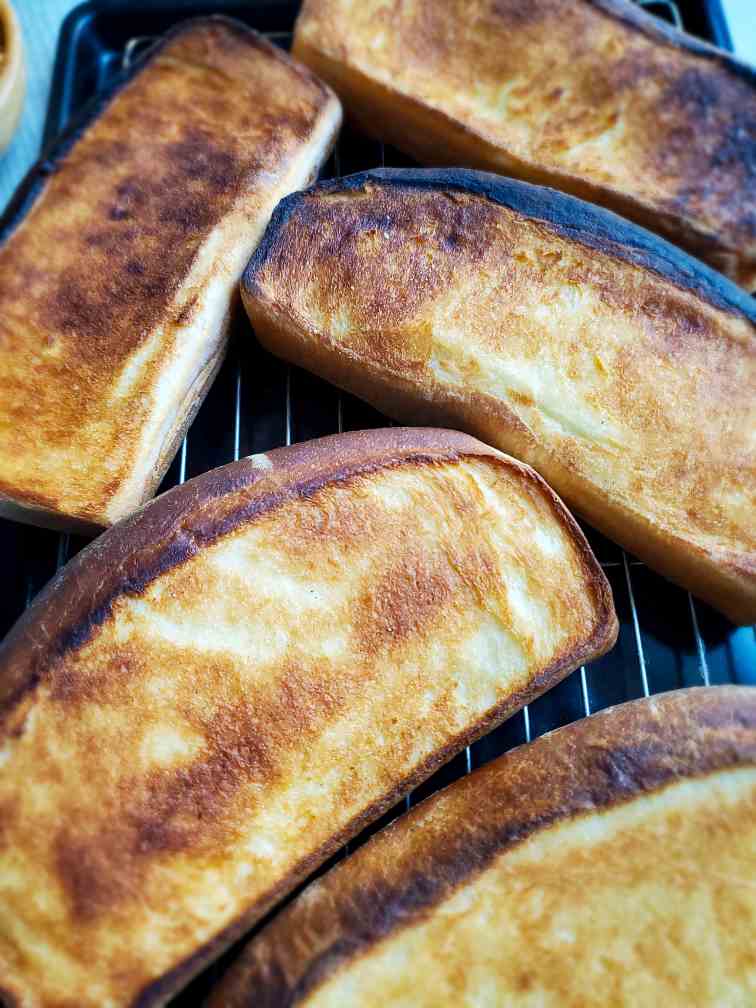
Turn on the broiler setting in the oven. Apply melted/softened butter or coconut oil on one side first. Then broil for about a minute or two until they get nice and brown. (for more info read the “important info” part in the recipe description.)

-
Then turn the other side. Apply butter or coconut oil and broil again until nice and brown. Let the bread cool down on a cooling rack for a while before you cut them. So the crumbs can settle in.


Leave a Comment